Podcasting, "On the Cheap" and Beyond
In the other sections of this site, I have been careful to discuss only my use of audio files in an online version of the course "Writing, Style, and Technology" here at Eastern Michigan University. I haven't described podcasting in these other sections because, as I discussed in the section Defining Terms, audio files and podcasts are two subtly different things. Just to review:
-
Both audio files and podcasts presume making content available via the Internet, such as in the form of an mp3 file.
-
Podcasts, while usually just audio files, can be more than just audio.
-
Podcasting presumes syndication which allows potential listeners to subscribe to your podcast.
At the beginning of my Fall 2005 version of "Writing, Style, and Technology," I used only audio files, and, as I discuss in the "Recording and Uploading Audio" section of this site, I posted audio files within my course management system. Because of this, only students registered for the course could access these audio files. But since I was using these recordings to supplement my written notes and explain some of the more complex readings in my course, distributing the audio files via the eCollege interface made a certain amount of sense.
In the middle of Fall 2005 and more in earnest at the beginning of the Winter 2006 term, I developed a podcast for the course. The current version of my course podcast is available at http://krause328.blogspot.com/. The purposes and style of my podcasts are quite different than my audio files in a couple of ways. First, unlike the audio files, my podcasts for "Writing, Style, and Technology" are brief and comparatively informal. While my audio files on the course site are focused on the reading assignments and are similar to a classroom lecture, my podcasts are more open-ended and similar to the comments I might give to a face-to-face class after passing back a writing assignment or as a way of updating them about future due dates and projects. I think that this difference between "audio files" and "podcasting" has more to do with my particular implementation than with the inherent capacities of the technology, though, as I will explain below, I think the technology I began and continue to use for podcasting lends itself to a brief and "on the fly" format.
Second, rather than create audio files with Audacity or GarageBand and then making them available for a podcast with either the server space at EMU or server space I lease, I created a podcast using the "on the cheap" (free, except for the cost of the phone call) resources of Blogger, Audioblogger, Feedburner, and iTunes. I took this approach because my students were already using Blogger-based blogs for other writing assignments, and because I wanted to begin modeling for them a way that they too could create a podcast for the class and beyond.
The rest of this section, "Podcasting, 'On the Cheap' and Beyond," explains how I created a full-fledged podcast. As was the case in the section "Recording and Uploading Audio," I don't mean to suggest that this is the only way or even the best way to create podcasts. Further, it's important to make clear here that this method for publishing podcasts depends on the availability of Blogger, Audioblogger, Feedburner, and iTunes--services that (given the changing nature of the Internet) might work quite differently or be unavailable in the near future.
With those qualifications in mind, setting up a podcast and making it available via a service like iTunes involves three basic steps:
-
Publish audio to a blog space in one of two ways:
-
Audio you record that you link to your blog or a Blogger blog
-
Audio recorded with Audioblogger and then automatically posted to your Blogger blog
-
-
Set up an RSS 2.0 feed for your podcast and blog, preferably with a service like Feedburner
-
Make your RSS 2.0 feed available on iTunes or another service that distributes podcasts
Publishing audio to a blog space, method #1: on your own
If you have the server access and technical know-how to publish a blog with software like WordPress, MoveableType, or Drupal, then you can complete this first step by following the process I explain in the section "Recording and Uploading Audio." In short, record the audio file; upload the audio file; link to the audio file on your blog. If you maintain a Blogger blog on your own server and not on Blogger's free "blogspot" service, you can follow this process as well.
Publishing audio to a blog space, method #2: Using Audioblogger on your Blogger blog
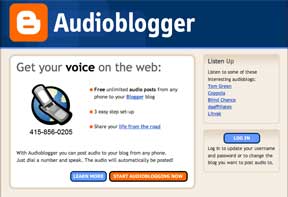
If you don't have server access, a lot of technical know-how, or a desire to work with software like Audacity or GarageBand, you can still post a simple and nearly free podcast. As you probably already know, Blogger is a service that allows users to publish blogs easily and for free. (Of course, not all blogs are on Blogger, thus my use of the somewhat awkward phrase "Blogger blog" to indicate a blog available via the Blogger service). But you might not be aware of a related service, Audioblogger, which allows users to record and automatically post audio to their Blogger blogs with just a phone call.
Audioblogger has its limitations. I have found it to be buggy in that it sometimes doesn't seem to work well or at all. You are limited to five minute posts, the sound quality is limited to that of your phone, and you cannot easily edit these files because they are posted to the blogspot server space automatically. Still, it is an easy-to-use service, it doesn't require the user to have any special server access, and it's nearly free.
Here's how I did it:
-
Set up a blog with blogger. Setting up a Blogger blog is relatively easy, but feel free to read through and/or use this tutorial I wrote to help my students set up a blogger blog. I posted my Blogger blog for "Writing, Style, and Technology" to the free blogspot option because that is what my students use.
-
Go to http://audioblogger.com.
-
Set up your Blogger blog for recording audio. :
-
Click on the orange "Start Audioblogging Now" button.
-
This will take you to "step one" for setting up audioblogger, which is where you provide your Blogger username and password--in other words, the same username and password you have for Blogger. Click continue.
-
"Step two" involves selecting a blog for your audioblogging posts. Blogger allows a user to have multiple blogs, but you can only have one that works for Audioblogger. If you only have one Blogger blog anyway, you won't have any choices. Once you pick the blog to host your audio messages, click continue.
-
"Step three" is phone information. Enter the phone number (including area code) which you will use for recording your audio blog posts. Personally, I use my cell phone for recordings. Also, enter a PIN, which is limited to four digits.
-
"Finish Up."
-
-
Call 415-856-0205 and follow the instructions. The automated instructions will ask for the primary phone number, which is the phone number you just entered in step three. Then it will ask you for your PIN, and then it will give you instructions for recording. Simply record the message you want published to your blog, being mindful of the fact that you only have five minutes.
-
Wait a few minutes, and then log into your Blogger blog. How long this takes depends a lot on how well the Audioblogger service is working.
-
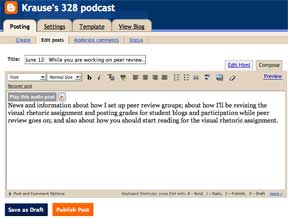
Edit your Blogger blog entry as you see fit. Audioblogger will post only an icon and a link to your audio file; so, if you want to add text describing your audio post, you need to do it by editing the entry with Blogger. From the Blogger "Dashboard," click on the link to your blog so that you can get to the page where you can edit your blog posts. If your audio entry was posted correctly, you should have a new "untitled" post. Click on the "Edit" button for this post. What you should see is an icon that says "play this audio post" with a "play" triangle next to it. This is your audio file.
You don't have to edit your entry to allow blog readers or podcast subscribers (if you've set up your podcast, that is) to listen to your recording, but it's probably a good idea to provide some text to explain what is contained in the audio file.
Almost all of the sound files available at my Blogger blog which I use primarily for podcasting (http://krause328.blogspot.com/) were recorded with my cell phone; here is one example which I literally recorded on the street while walking my dog. No one is going to confuse these recordings with the work of a professional using high-end equipment. On the other hand, I think for simple speech messages, Audioblogger has certainly been adequate for my needs, especially when its cost (free, except for the phone call) and ease of use are considered.
Setting up and RSS 2.0 feed for your podcast (and your blog)
As I've already discussed throughout this site, podcasting is more than uploading audio or other content to a web or blog space, even though this distinction is often not recognized. Rather, the difference between an audio file on a web site site and true podcasting is the ability for users to subscribe to podcasts, either with the well-known iTunes or a similar software, and automatically receive updates when there are new audio files available. The technology that allows for this syndication or "feed" is called RSS, an abbreviation for "Really Simple Syndication" (although, as this wikipedia entry suggests, there is some disagreement about what RSS actually does stand for).
RSS is an XML technology that allows web content developers to broadcast a "feed" for potential users. Most popular news sites on the web--CNN, The New York Times, and USA Today, just to name three--include RSS information on their sites so that you can use software that is on your computer or a service on a web site--known as an Aggregator or "Reader"--to read the information broadcast by the feed. There are many different software and web site options for readers, as you can see from this list of free RSS readers.
The benefit of this technology is it allows you to read recently updated text from a bunch of different web sites in one place (the "Reader") which is set to your own preferences. For example, if you used an RSS reader, you could read the latest headlines and opening paragraphs from CNN, The New York Times, and USA Today on one site. Further, the same technology that allows readers to subscribe to the text published on a blog or other website is the same technology that allows listeners to subscribe to the audio published on a blog or other web site.
Thus, a podcast.
 Setting
up an RSS feed is easy--in fact, if you are using your own server and blogging
software, you probably already have an RSS feed that is compatible with services
like iTunes. Blogger blogs, however, use a different RSS format than the one
iTunes requires, which means that if you want your podcast to be available
to users there, you will need to set up an RSS 2.0 feed with an additional
step. While there are many ways to do this (as this
article from the site Search Engine Watch suggests), I use and recommend
Feedburner.
Setting
up an RSS feed is easy--in fact, if you are using your own server and blogging
software, you probably already have an RSS feed that is compatible with services
like iTunes. Blogger blogs, however, use a different RSS format than the one
iTunes requires, which means that if you want your podcast to be available
to users there, you will need to set up an RSS 2.0 feed with an additional
step. While there are many ways to do this (as this
article from the site Search Engine Watch suggests), I use and recommend
Feedburner.
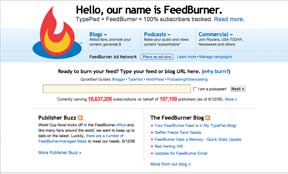
Feedburner has a free service and a fee-based "pro" service. To get started with the free service, go to http://www.feedburner.com. As you can see, this user-friendly site will walk you through how to set up the right kind of RSS feed, but basically, you should enter the URL for the blog where you plan to publish your podcast materials. While there are different formats for RSS feeds, select RSS 2.0 since this is the one that is compatible with iTunes.
 Your
Feedburner feed will be compatible with a number of services for reading podcasts
and RSS feeds besides iTunes. Further, Feedburner provides some other useful
services for tracking how your feed (and thus your site) is being used by
others. The primary difference between the "free" and the "pro"
version of Feedburner is the amount of information you as a publisher can
find out about your readers or listeners.
Your
Feedburner feed will be compatible with a number of services for reading podcasts
and RSS feeds besides iTunes. Further, Feedburner provides some other useful
services for tracking how your feed (and thus your site) is being used by
others. The primary difference between the "free" and the "pro"
version of Feedburner is the amount of information you as a publisher can
find out about your readers or listeners.
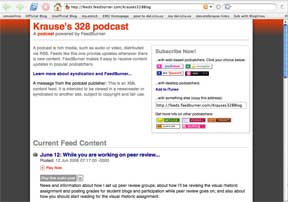
For example, the feed for my "Writing, Style, and Technology" Blogger blog where I publish my podcasts is http://feeds.feedburner.com/Krauses328Blog. Note that this is different than the URL for the blog itself; rather, this is the address for the RSS 2.0 feed. As the image above suggests, Feedburner makes it easy to subscribe to this feed with a number of other services--for example, podnova, My Yahoo!, and Odeo (the icons of which can be seen in the upper-right corner of the screenshot above). But currently, the most popular software option for subscribing to and listening to podcasts is iTunes.
Make your RSS 2.0 feed available on iTunes
The first step for making your podcast available on iTunes is, not surprisingly, to install the iTunes software. If you are a Mac user or if you are a PC users who also owns an iPod, you certainly already have it. If you are a PC user and you don't have iTunes yet, you can download it for free (visit http://www.apple.com/itunes/download/) and install it. However, be careful when installing it so your default settings for playing audio files or CDs don't change--unless you want them to change.
 The
next step is to visit the iTunes Music Store, which is simply a link within
iTunes. Then, click on the link Podcasts, which is a link within the iTunes
Music Store. Here you'll see this icon for submitting a podcast. You will
need to have an iTunes Music Store account in order to submit a podcast (although
you don't need to buy anything), so if you do not already have an iTunes Music
Store account, you will be prompted to set one up.
The
next step is to visit the iTunes Music Store, which is simply a link within
iTunes. Then, click on the link Podcasts, which is a link within the iTunes
Music Store. Here you'll see this icon for submitting a podcast. You will
need to have an iTunes Music Store account in order to submit a podcast (although
you don't need to buy anything), so if you do not already have an iTunes Music
Store account, you will be prompted to set one up.
 After
you set up your account (or right away, if have an iTunes Music Store account
already), you'll be taken taken to a screen asking you for you to submit
your podcast to the iTunes directory of other podcasts. Where it says "Podcast
Feed URL," enter in the URL of the RSS 2.0 feed--in this case, http://feeds.feedburner.com/Krauses328Blog
since I used Feedburner to set up this feed in the first place.
After
you set up your account (or right away, if have an iTunes Music Store account
already), you'll be taken taken to a screen asking you for you to submit
your podcast to the iTunes directory of other podcasts. Where it says "Podcast
Feed URL," enter in the URL of the RSS 2.0 feed--in this case, http://feeds.feedburner.com/Krauses328Blog
since I used Feedburner to set up this feed in the first place.
Click continue, and if everything works, you will be prompted to complete the registration process (this includes choosing a podcasting category), and you will then have a podcast as part of iTunes.
Within a week or so, you will receive an email from the iTunes Music Store indicating that your podcast has been reviewed and is now a part of the iTunes directory for podcasts and listeners will be able to browse or search specifically in iTunes for your podcast. For example, I tell students to go to iTunes Music Store and then to the podcasting section. Search for "Krause's 328 podcast," and they are taken to the page for my class podcast within iTunes:
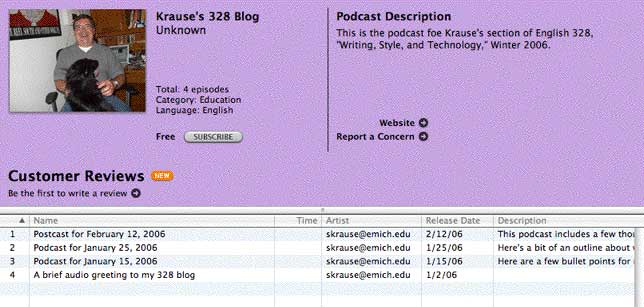
After listeners subscribe, new podcast "episodes" (in other words, new audio files that I have recorded to my Blogger blog with Audioblogger) will automatically download to the subscriber's iTunes space every time they launch the software.
See Also:
-
"How To Podcast Tutorial" web site, which offers similar advice to what I offer here.
-
Odeo Studio, which is a new service which also allows users to record audio with a microphone, a camera, or a phone.